Showing posts with label Rod Repair. Show all posts

Monday, May 7, 2012

Rod Repair: Applying Finish

The last step in fixing a rod by putting on a new wrap is to apply finish to the wrap. The epoxy I use is Flexcoats high build it runs about $13 at Mudhole Tackle supply. I am not the greatest at finishing a rod but I am getting better with time and practice so if your does not come out perfect the first time don't panic. If you get the "Fuzzies" you can gently sand them after the finish has dried and add a second coat. There are countless articles and message boards to reference by googling rod building fuzzies.

Once again I am going to leave you with a Youtube video that is easy to follow and understand.
Once you have allowed your finish to dry wait atleast 24 hrs or more before bending or fishing with the rod. This allows time for the Finish to full dry and any stress can causes cracks in the finish.

Out With The Old 


In With The New (with a little ECU touch) 


I hope I have provided the basics of rod wrap repair, any question feel free to comment or email me. If I don't know the answer I can find it. Just remember this is not a fast process the first couple times around, take your time enjoy it and good luck. 

J.Jones 

Friday, April 27, 2012

Rod Repair: Color Preserver

Alright so we have removed the old wrap and finish reset and replaced the guide with a new wrap. The next step to ensure that your color remains after you apply your finish. This is perhaps the best $3 you can spend to make your wrap look good.
So rather than me make a poor quality video showing you my amateur rod repairing skills. I will provide you with high quality videos from YouTube. Once again using Mudhole Rod Building supplies Rod Building 101 videos.

Color Preserver:
J.Jones 

Friday, April 13, 2012

Rod Repair: Wrapping Guides

We have our guides, blank, tools, and material ready. I wrapped the rod previously seen in older post however my photos didn't come out as clear as I wanted them to. So I have gathered the three top resources that I personally used to to learn to wrap. Take a look at them they all come from reliable sources and are clear and basic.


  • First at bat is a Youtube video put together by Mudhole Tackle supply. 


Good luck wrapping.

J.Jones

Friday, April 6, 2012

Rod Repair: Wrapping Tools

If you have read about rod building you quickly realize the set up cost can become expensive. According to most books you "need"  a list of tools a mile long. There is a way to make this an affordable hobby or short project depending upon you purpose. I have gathered a list of the few tools I use, they are not the purist tools  that are featured in the book. They are tools are readily available with out ordering and they perform the same job well.

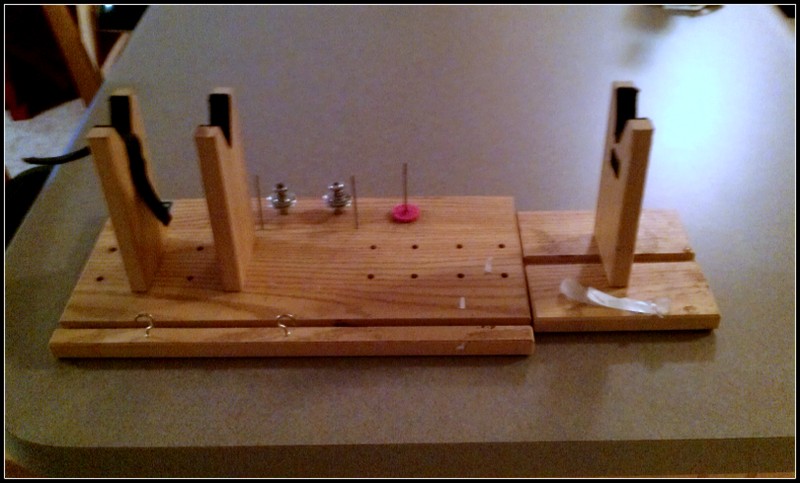
Most important is your wrapper, I got lucky and picked up a Flex Coat hand wrapper featured below.

-Many people build their own, either classic design or custom. Recycled wood can help keep cost down. 
-If your broke or don't have the time to invest in building a wrapper, you can use a shoe box pictured below.

- Thread: either order from a rod building supplier, or grab some all purpose thread at the craft store.

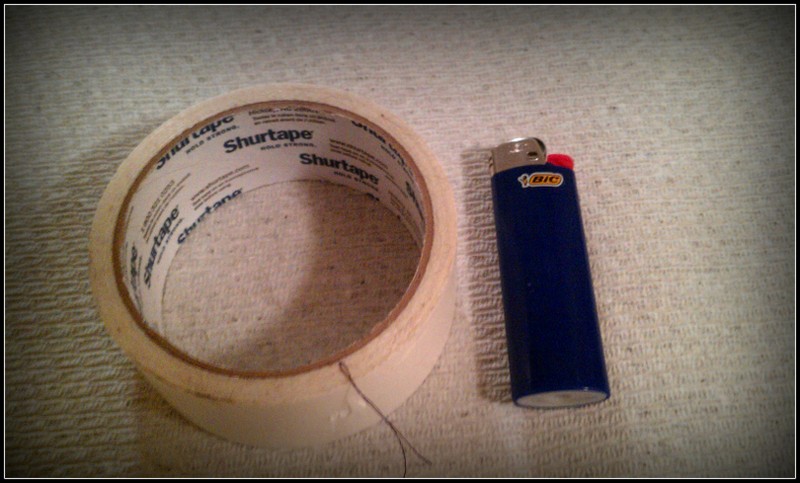
- Tape: For holding the guides into place while wrapping, I use carpet tape due to it being double sided, regular tape will work as well.

- Lighter:  For burning off loose threads, lint, and heating up tip glue. You don't need a alcohol burner a Bic will work fine. 
Tip Glue: A regular craft glue stick will work just fine, the one pictured happens to be a branded tip glue. 

Razor Blade: Used to cut threads and shave off excess tip glue. This is the most important tool, you can also use scissors for cutting thread. 

This is my personal list of tools, you can find extensive commercial products and alternatives at other sources. Now go to Lowe's, Walmart, wherever just gather your tools and get ready for wrapping. 

J.Jones 

Friday, March 30, 2012

Rod Repair: Phase I

Step One to fixing a problem: Admit you have one. 
Several things cause this bent/ broken guide, chipping epoxy, ugly wrap colors or whatever you want it to be. 

The rod I will be featuring is a IM6 graphite rod that was formally 7ft but due to a window accident is now 6'10. Its also a 2008 model and its wraps have seen their better days. So I am going to briefly display the re-wrapping of a rod. I am no master wrapper to say the least but I make it work with out sacrificing the structural integrity. 

Step Two: Remove said problem from your life 
This only requires a simple razor blade, I have found that cutting along the top of the guide foot then removing the guide is the easiest way to start.
Once the guide is out try to peel the epoxy like a shrimp. Also continue to shave the rest of the epoxy off of the rod carefully not to dig in the blank itself.

Step 2.1 
Take a china marker, tape, sharpie, crayon, or whatever you have available and mark where your guides sit as you will need these points when re-wrapping. 

In conclusion: We admitted that we have a problem and we have taken the first step in fixing it. 

Next Repair post we will discuss what tools are needed for re-wrapping and some cheaper alternatives.

Now I gathered most of my information from two sources listed below take a look, they show a more in depth look at rod building in general. This may be something you want to pursue, I have only scratched the surface here. 

Check it: